Buying a Fixer-Upper in Metro Vancouver: A Renovation Buyer's Guide
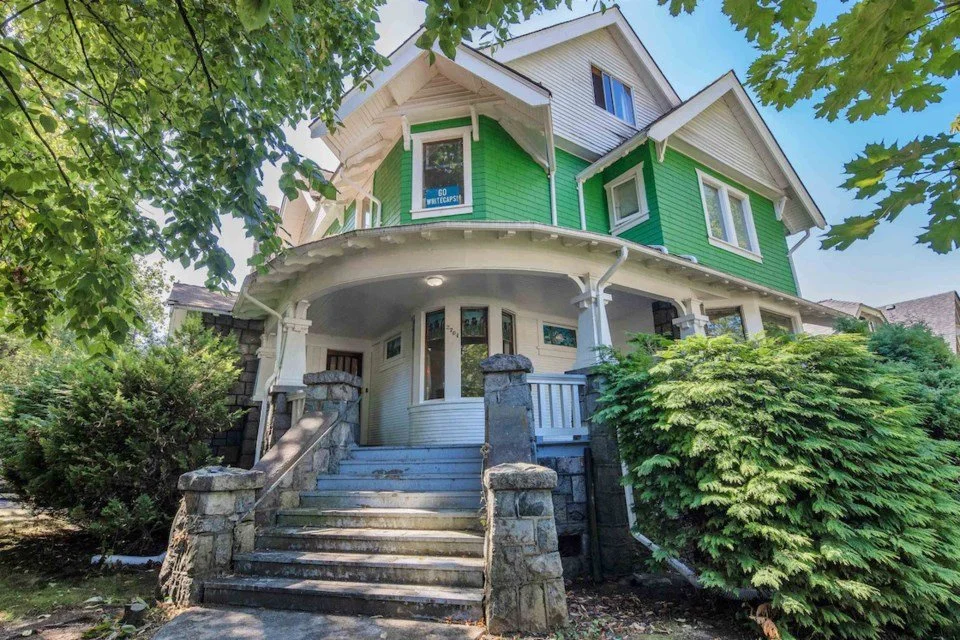
Photo from Vancouver is Awesome
There's a particular kind of excitement that comes with walking through a dated, slightly tired house and seeing what it could become. Maybe it's the 1970s rancher with the choppy floor plan you know could open into one bright great room. Maybe it's the character home in East Van with a kitchen frozen in 1985 and a claw-foot tub you'd love to keep, surrounded by everything else you'd love to replace.
Buying a fixer-upper, a pre-owned house you plan to renovate, is one of the most rewarding ways to get into the Metro Vancouver housing market, and one of the most misunderstood. Done well, it lets you buy into a neighborhood you couldn't otherwise afford, build genuine equity, and end up with a home that's actually yours in every sense, down to the tile in the shower. Done without enough homework, it can turn into a money pit that swallows your down payment before the drywall is even open.
This guide walks through the five things worth scrutinizing most closely before you buy, how to think about budgeting for the unknowns, and, because this is Metro Vancouver, what the BC Energy Step Code and Zero Carbon Step Code actually mean for your gas fireplace, your insulation, and your renovation plans.
Why Buy Pre-Owned to Renovate in the First Place?
Before getting into the checklist, it's worth naming why this strategy appeals to so many buyers in this market. New construction in Metro Vancouver comes at a steep premium, and much of what's available is either a high-density condo or a spec-built house designed to appeal to the broadest possible buyer, not to your taste. An older, well-located house lets you pay for land and bones rather than finishes, then spend your renovation budget exactly where you want it: an open kitchen that looks out over the backyard, a primary ensuite that feels like a hotel, a basement suite that helps with the mortgage.
The tradeoff is that you're inheriting someone else's decisions: their electrical panel, their foundation, their choices about where the load-bearing walls went. The five areas below are where those inherited decisions matter most.
The Top 5 Things to Watch For Before You Buy
1. Structural Layout and Load-Bearing Walls
If your dream is an open-concept main floor, this is the single biggest variable in your entire project, and it needs to be assessed before you write an offer, not after you've moved in.
Older Metro Vancouver homes, especially those built between the 1950s and 1980s, were typically framed with a central load-bearing wall or a row of load-bearing posts running down the middle of the house, often exactly where you'd want to remove a wall to connect the kitchen to the living room. Removing that wall is entirely possible in most cases, but it isn't cosmetic work. It requires:
A structural engineer to assess the existing framing and design a replacement beam (steel or engineered wood) sized to carry the load
A building permit, since any structural wall removal in BC requires one
Possible foundation or footing upgrades if the new point loads land somewhere the existing foundation wasn't designed to carry them
Coordination with electrical and mechanical trades, since walls you're removing often have wiring, plumbing stacks, or ductwork buried inside them
The cost range for this work is wide. A straightforward beam replacement with a modest span might run $8,000–$15,000 including engineering and permits. A larger span, a second-storey load bearing on the wall, or a foundation upgrade can push that number well past $30,000. Before you buy, it's worth paying a structural engineer a few hundred dollars for a pre-purchase consultation, or at minimum asking your home inspector to flag anything that looks load-bearing so you can get a second opinion before subjects are removed.
2. The Kitchen and Bathroom "Wet Wall" Locations
Custom kitchens and bathrooms are usually the emotional heart of a renovation, and they're also where plumbing decisions from decades ago quietly control your budget today.
Every kitchen and bathroom is built around a "wet wall," the wall containing the drain, waste, and vent (DWV) stack that everything else ties into. Moving a sink, tub, or toilet more than a short distance from that stack means extending drain lines, which affects slope requirements, and it often means opening up floors or ceilings you weren't planning to touch. Relocating a kitchen island with a sink in it, for instance, frequently means core-drilling a concrete slab or running a new drain line down through a ceiling in the room below.
Things to evaluate before you buy:
Where the existing stack is, and how far your dream layout would move fixtures from it
Whether the home has a single stack or multiple, which gives more flexibility
Whether the electrical panel has room for additional circuits (custom kitchens with double ovens, induction cooktops, and dedicated appliance circuits eat up panel space fast)
The condition of any existing polybutylene or galvanized plumbing, which may need full replacement regardless of your renovation scope
A kitchen that keeps its existing footprint but gets all-new cabinets, counters, and appliances is a very different budget than one that moves the sink twelve feet and adds an island. Knowing which one you're signing up for before you own the house avoids a nasty surprise mid-project.
3. Foundation, Roof, and Building Envelope Condition
This is the least glamorous item on the list and the one most likely to derail a renovation budget if it's ignored. Structural walls and plumbing are visible, plannable costs. Foundation cracking, roof condition, and moisture intrusion in the building envelope are the costs that hide until demolition starts.
Metro Vancouver's wet climate is unforgiving of aging building envelopes. Common issues in pre-owned homes include:
Foundation cracking or settling, particularly in homes built on clay soils common in parts of the Fraser Valley and North Shore
Rot in window sills, siding, or roof sheathing from long-term moisture exposure
Aging or missing rainscreen assemblies, which became a building code requirement after the "leaky condo crisis" of the 1990s but many older single-family homes were never retrofitted
Roofs at or past their service life: asphalt shingle roofs in this climate typically last 20–25 years
A thorough pre-purchase inspection, ideally one that includes a moisture meter reading on exterior walls and a look in the crawlspace or attic, is worth the few hundred dollars it costs. If you're already planning to renovate, this is also the moment to think about whether you'll address the building envelope as part of the project. Opening up walls for a renovation is the cheapest opportunity you'll ever have to add insulation and fix moisture issues, because the walls are already open.
4. Zoning, Lot Coverage, and What You're Actually Allowed to Build
You can design the open-concept dream kitchen of your life, but if the addition needed to fit it exceeds your lot's buildable area, none of it matters until the plan changes. Before buying, it's worth a quick check of the municipality's zoning bylaw for:
Maximum floor area ratio (FAR) and how much of it the existing house already uses
Setback requirements, especially if you're planning any addition rather than a renovation within the existing footprint
Whether the property is in a heritage conservation area or has a heritage designation, which can significantly restrict exterior changes
Whether a secondary suite or laneway home is permitted, if that's part of your long-term plan for the property
Municipalities across Metro Vancouver, Vancouver, Burnaby, Surrey, North Vancouver, and the rest, each have their own zoning bylaws and permit processes, so what's allowed a few blocks away in a different municipality may not apply to the specific property you're considering.
5. Electrical Service Capacity
This one is easy to overlook because it's invisible until you're planning your appliance layout. Homes built before the 1990s frequently have 100-amp electrical service, and some older homes still have 60-amp service. A modern kitchen with an induction range, a wall oven, a microwave drawer, and small appliance circuits, combined with a heat pump, an EV charger, and a hot tub or sauna some buyers add during a renovation, can push total demand well past what older service can handle.
Upgrading service from 100-amp to 200-amp typically costs $3,000–$6,000 depending on whether the utility needs to run new overhead or underground service, and it's worth budgeting for from the outset if your renovation includes a fully custom kitchen, electrification of heating (more on that below), or an EV charger.
Budgeting for a Renovation: The Realistic Way to Do It
Once you've assessed those five areas, the next question is always the same one: how do you actually build a budget you can trust, instead of a number that falls apart the moment the first wall comes down?
Start with a detailed scope, not a lump-sum guess. "Renovate the kitchen and open up the living room" isn't a budget line, it's a wish. Work with a contractor or designer to break the project into line items: demolition, structural work, electrical, plumbing, framing, insulation, drywall, flooring, cabinetry, countertops, plumbing fixtures, appliances, and finishing. A number attached to each line is far more useful than one number attached to the whole project, because it lets you see exactly where you have flexibility later.
Get the invisible stuff quoted before the visible stuff. Structural engineering, permit costs, and any known foundation or envelope repairs should be quoted and locked in early, since they're the least flexible part of your budget. The kitchen island finish can change; the beam size an engineer specifies can't.
Build in a contingency of 15–20%, not 5%. This is especially true with pre-owned homes, where opening up a wall can reveal knob-and-tube wiring, rot, or asbestos-containing materials (common in homes built before 1990, including in vermiculite insulation, popcorn ceilings, and some floor tile adhesives). Asbestos testing and abatement, if needed, is a real cost that's very difficult to predict before demolition begins.
Sequence the work around what's behind the walls. Because structural, electrical, plumbing, and insulation work all happen at the same "walls open" stage, it makes sense to do all of it at once rather than opening the same wall twice. This is also the point to fold in energy efficiency upgrades, since the incremental cost of adding proper insulation while the wall is already open is much lower than doing it as a standalone project later.
Get financing sorted before you fall in love with a finish. Renovation-specific mortgage products (like a purchase-plus-improvements mortgage) can roll a portion of renovation costs into your mortgage based on the home's after-renovation value, which is often a more favorable rate than a personal loan or line of credit. Talk to a mortgage broker early in the process, ideally before you're firm on the house, so you know your real ceiling.
The BC Energy Step Code and Zero Carbon Step Code: What Actually Applies to a Renovation
This is the part of the process that catches a lot of renovating homeowners off guard, partly because there's genuine confusion about what these codes cover, and it's worth being precise about it.
What the Step Code is. The BC Energy Step Code is a province-wide, performance-based standard that sets increasingly strict energy-efficiency targets for buildings, measured through metrics like airtightness testing and modeled energy use rather than prescribing a single insulation value for every wall. Since 2018, new construction permit applications across BC have needed to demonstrate compliance with a "step" on this scale, and municipalities have been ratcheting up the required step over time.
The Zero Carbon Step Code layers on top of that. Introduced provincially in 2023, it specifically targets greenhouse gas emissions from the building's systems, space heating, water heating, and cooking, rather than just overall energy efficiency. In practice, this is the piece that determines how much (if any) gas equipment a new building can install, since it requires modeling the emissions of the highest-emitting system in the home.
Where this gets confusing for renovators is scope. These codes were built primarily around new construction. A cosmetic renovation of an existing house, new cabinets, new flooring, new paint, generally doesn't trigger a Step Code review at all. But the moment your project crosses into permit-triggering territory (structural changes, a significant addition, new suite creation, or in some municipalities, whole-house renovations above a certain scope or value), you may be required to bring some or all of the home up to current energy standards, depending on your specific municipality's bylaws. This varies enough between Metro Vancouver's 21 municipalities that it's essential to ask your municipal building department directly, early, what triggers apply to your specific scope of work before you finalize a design.
Gas Fireplaces and Appliances Specifically
This has been a genuinely moving target. Some municipalities, including the City of Vancouver, had restricted gas heating and water heating in new construction under local zero-emission bylaws layered on top of the provincial Step Code. Vancouver City Council voted to repeal its ban on natural gas in new homes in a 7–4 vote in late May 2026, reopening the door to gas fireplaces and gas heating in new Vancouver construction. That said, the repeal applies specifically to City of Vancouver bylaws and does not extend to the broader Metro Vancouver region, where other municipalities' bylaws and the provincial Zero Carbon Step Code still apply independently. It's also worth knowing that this is politically active territory right now, and provincial and federal objections were raised before the vote, so further changes aren't out of the question. The practical takeaway: if a gas fireplace or gas range is important to your renovation, confirm the current rules with your specific municipality's building department rather than relying on a general answer, since this is genuinely different city to city and has changed more than once in the past few years.
Insulation and R-value
Rather than a single R-value target for every wall, the Step Code approach asks you (or your energy advisor) to model the whole building's performance and hit an overall target, which gives some flexibility in how you get there, better windows can offset slightly less wall insulation, for instance, as long as the whole-building number works out. For a renovation that opens up exterior walls, this is genuinely one of the best opportunities in the whole project: upgrading from old batt insulation to modern continuous insulation, or adding exterior rigid foam when siding is being replaced anyway, costs a fraction of what it would to do as a standalone retrofit later, and it pays back over time in comfort and utility bills regardless of what step your specific project is required to meet.
The Practical Path Forward
Before finalizing your renovation scope, call your municipality's building department and describe the project in specific terms (square footage, whether you're touching the exterior envelope, whether you're adding a suite) and ask directly what Step Code or Zero Carbon Step Code requirements apply.
If your project does trigger energy code compliance, budget for an energy advisor early in design, not after, they can model options and tell you where your money gets the most efficiency for the least cost, rather than over-building in one area and under-building in another.
If gas equipment matters to your design, get written confirmation of current local rules before you commit to a layout built around a gas range or fireplace, given how recently and how significantly these rules have shifted.
Treat any wall you're opening for other reasons as a free opportunity to improve insulation, since you're already paying the labour cost to open and close it.
Bringing It Together
Buying a pre-owned house to renovate in Metro Vancouver is a genuinely good way to end up with a home built around how you actually live, rather than how a builder guessed you might. The projects that go well share a pattern: the buyer understood the structural layout, the plumbing stack locations, the building envelope condition, the zoning limits, and the electrical capacity before they bought, not after. They built a budget with real contingency and sequenced the invisible work, structural, electrical, plumbing, insulation, all at once, while the walls were open. And they treated the Step Code and Zero Carbon Step Code not as an obstacle to route around, but as one more thing to confirm early with their specific municipality, since the rules are detailed, they vary by city, and, as the Vancouver gas bylaw reversal in 2026 showed, they can genuinely change while you're still in the planning stage.
None of this replaces a good contractor, a good structural engineer, or a good conversation with your municipal building department before you buy. But walking into that first conversation already knowing what questions to ask is what separates a renovation that becomes the home you wanted from one that becomes a lesson learned.